Hey Folks!
Harvest has begun!…. Garden harvest that is. My small beet crop has been harvested and preserved with this amazing pickled beet recipe.
For those of you that enjoy beets from the salad bar I encourage you to give this recipe a try.
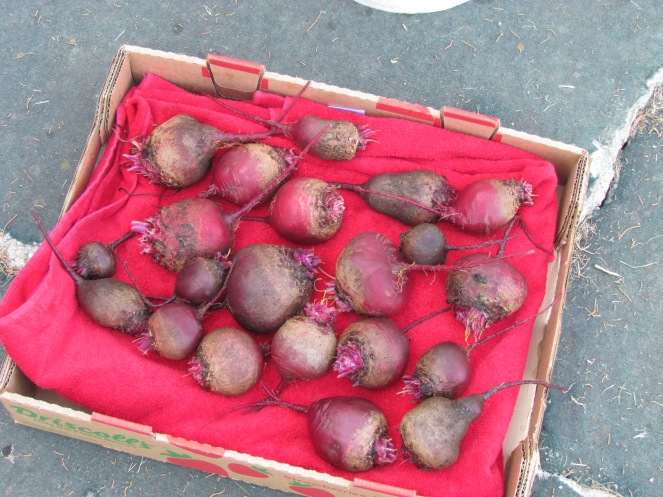
Step 1: Harvest your beets.
I recommend leaving your beets in the soil until right before your ready to begin the pickling process. I plucked a few out of the garden a few days back and they became to tender to use in this recipe. This year I had only a few beets in the garden since we are still eating the pickled beets from two years ago 🙂
DO NOT CUT the entire top or root off the beets. Simply pluck the leaves off or even use a scissors to trim them an inch or so above the beet. This allows the beet to keep its natural juices inside, instead of bleeding out into the boiling water.
Wash them and set them aside to prepare step 2.
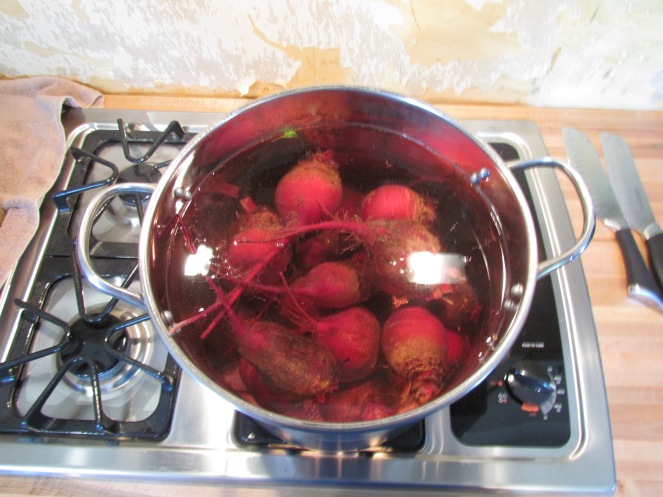
Step 2: Boil the skins off.
Prepare a large stock pot with water and bring to a boil on your stove top. Once the water begins to slightly bubble drop your beets into the pot. Boil until beets are fork tender.
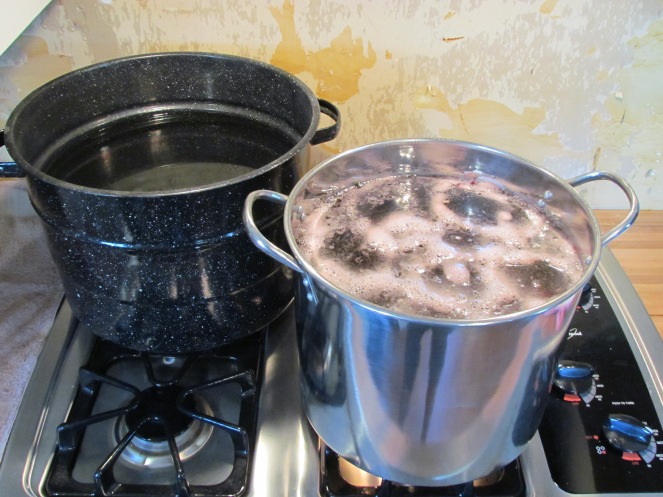
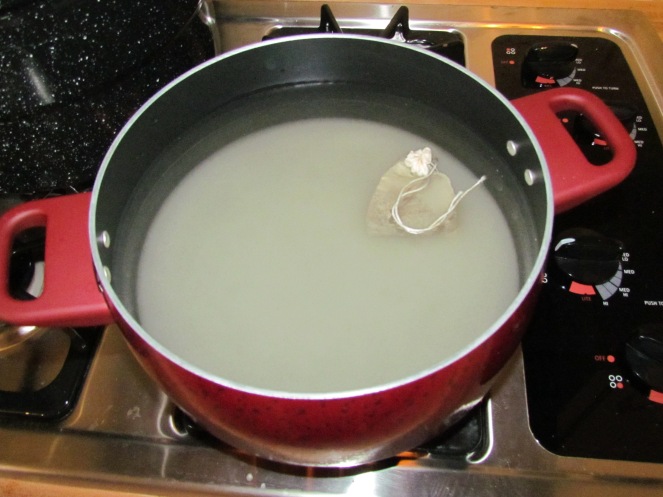
Step 3: Prepare your canning bath.
While your beets are boiling, begin filling your canning bath. You will want to fill the pot with enough water to just cover the jars when lowered into the bath. Turn on the burner to begin boiling the canning bath water (it takes quite a while for this large pot to boil).
 .
.
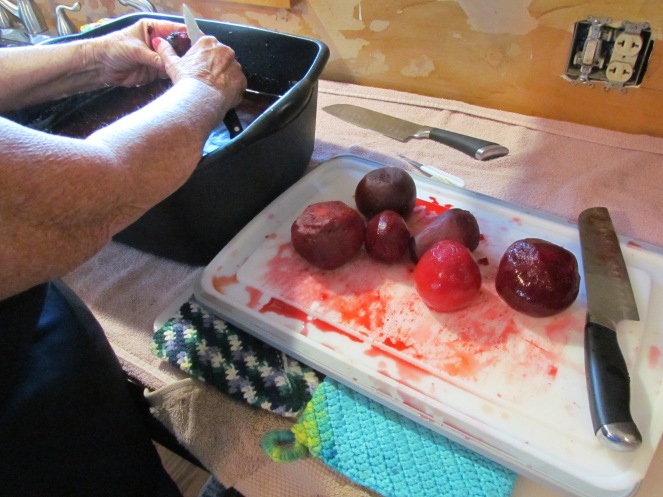
Step 4: Peel and cut your beets.
WARNING: BEETS ARE MESSY LITTLE BUGGERS….
Once the beets in the boiling water have become fork tender, remove from the heat and carefully strain the water off and set aside. Allow beets to cool. Once cool to the touch, simply peel the skin off with your hands. If the beets have boiled long enough the skin will peel away easily and the remaining beet will look like these below.
Cut or slice them to your desired size. There is no right or wrong way to do this. We prefer a bite size piece over a slice, but that’s just what we like. Suit yourself 🙂
Step 5: Prepare your pickling sauce.
Thank you Edna Mae Schmidt for submitting this recipe to the Zion Lutheran Ladies Aid cookbook in 1963. It has been a favorite for our family for quite a long time. Grandma Esther took a few notes in the margin. However, this time I decided to stick with the printed version simply because of the supplies I had on hand. Feel free to try grandma’s edits if you like.
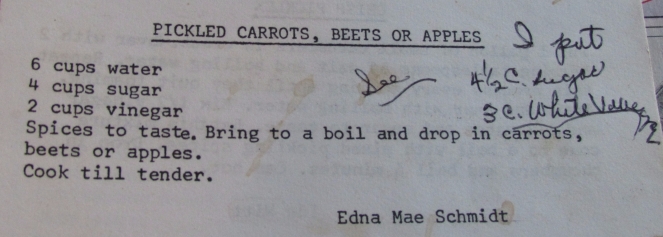
Add all ingredients to a large pot. Aluminum is not recommended. Next, add your spices. I choose to add 1 tablespoon of ground cloves and 1 tablespoon of allspice to a cheesecloth bag. As the mixture begins to heat stir continuously until sugar has dissolved and the spices have steeped into the mixture. Once the mixture has turned a grey/brown color, remove the cheesecloth bag.
Step 6: Add your beets.
This step could not be simpler. Simply add your cut/sliced beets to the pot and simmer for 15 minutes.
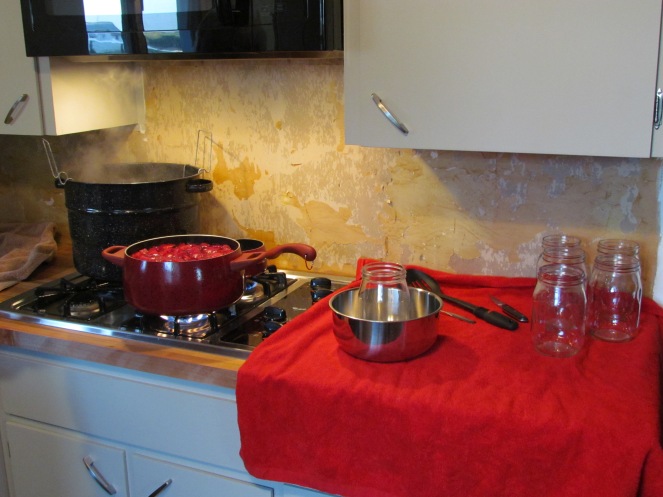 Step 7: Canning
- After your beets have simmered in the pickling sauce fill your jar of choice with beets & sauce leaving 1/2 inch of head space.
- Heat canning lids in a small saucer to soften the seal (the orange rubber rim of the lid) .
- Remove one lid and place on the clean mouth of your jar.
- Fasten the band around the mouth of the jar and lid.
- Place your full jars in the rack of your water bath. (Black pot on the back of my stove)
- When your rack is full, lower your finished product into the water bath. Make sure your jars are covered by the boiling water.
- Boil for 45-60 minutes.
- Gently remove your jars (try not to bang them around as they may shatter).
- Place on a counter or cooling rack to cool.
- As the temperature of the jar decreases you will hear the “POP” of the lid as it seals.
CONGRATULATIONS!!! Enjoy your beets 🙂
-CS
